Often when you install a VM in virtualbox you’ll notice that initial size of the VM image would be more or less equal to the disk space actually used in the VM. However with time, as you play around, you will find that the size of VM image would always keep on increasing. The disk space actually used would be far lesser than the VM image size. We would try to compress the VM image to the space actually used up inside the VM.
Pre-condition – The image that we are going to shrink should have been dynamically expanding type, when you created the disk very first time. This is explained for a windows VM. Theoretically should work on other VMs also.
Ok, Lets get started.
We’ll need the following tools:
1. http://www.feyrer.de/g4u/nullfile-1.02.exe : This tool zeroes out free space, which our next tool compresses. For Linux based OS, search for a file, zerospace.c, which you’ll have to compile yourself.
2. VBoxManage : This tool is the command line management tool that ships with VirtualBox. Whatever you can do with the GUI, can be done by this. + A lot more 🙂
Ok now.
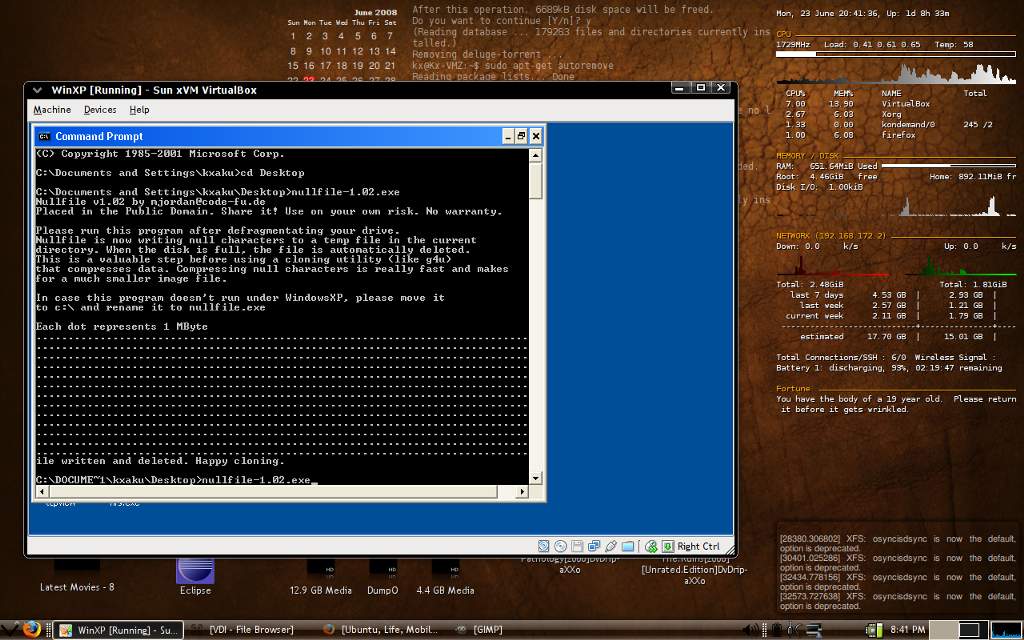
1. First boot into your VM. Defragment your drive atleast 2 times.
2. Copy the tool, nullfile mentioned above to the VM and run it. A simple double click should do it.
3. Now shutdown the guest. Open a terminal in the VM image directory. Most probably /home/_user_name_/.VirtualBox/VDI
2. Run our final command, We would be done after this.
VBoxManage modifyvdi _file_path_ compact
e.g. in my case I ran: VBoxManage modifyvdi /media/Blockk/VDI/NewHardDisk1.vdi compact
That’s it, It will take some time, and you’ll get your tiny, shiny, compressed VM image.
Using above tricks, I was able to compress my VM from 1.8gb to 700mb


December 18, 2008 at 12:03 am
[…] VirtualBox – Shrink your VDI images […]
February 1, 2009 at 9:29 pm
[…] https://kakku.wordpress.com/2008/06/23/virtualbox-shrink-your-vdi-images-space-occupied-disk-size/ (31) […]
February 7, 2009 at 9:05 pm
FYI, this method no longer works in VirtualBox 2.1.2 (possibly 2.1.0 also), because of changes to VBoxManage. It did work in 2.0.6.
February 21, 2009 at 7:56 am
[…] Ссылки по теме: • How To Convert From a VMware Image To Virtualbox Image • VMware to VirtualBox • Clone VirtualBox disk image on MS Windows mini-HOWTO • QEMU on Windows • Скачать qemu-0.7.1-win32-imgover4g.zip • Switching From VMWare To VirtualBox: .vmdk To .vdi Using Qemu + VdiTool • VBoxTool • VirtualBox – setup, share, shrink, convert • VirtualBox – Shrink your VDI images. Image size = Space used up inside VM […]
March 31, 2009 at 10:41 pm
[…] https://kakku.wordpress.com/2008/06/23/virtualbox-shrink-your-vdi-images-space-occupied-disk-size/ (101) […]
April 2, 2009 at 12:09 pm
Here is some related discussion with a few work-arounds:
http://forums.virtualbox.org/viewtopic.php?p=59796#59796
April 15, 2009 at 12:53 pm
Apparently, using the clonehd command will shrink your vdi when it copies it, so that should be the simplest workaround out there.
June 13, 2009 at 5:21 pm
In your screenshot on the right hand side you have something monitoring your system and putting it on the desktop. What program is it and have you made any changes to the config file? If so, can you post that as well?
Thanks!!
July 15, 2009 at 9:11 pm
For Windows Guests.. You can download SDelete utility from Microsoft to zero unused space with the option -c from here:
http://technet.microsoft.com/en-us/sysinternals/bb897443.aspx
Then you can use the following command from the Host OS..
VBoxManage modifyhd –compact
October 20, 2009 at 7:19 am
Duear Majed Sahli,
sorry if i make such a dumb question, but it’s my first time:
the sDelete utility should be downloaded and run into the virtual machine?
Thanks
November 1, 2009 at 11:22 pm
Yes 🙂
August 31, 2009 at 12:35 pm
It worked wonderfully for me!!!
HOST: Ubuntu 8.04
GUEST: Windows Xp
VirtualBox: 3.04 r50677
I was annoyed by my virtual OS taking 24GB (the maximum space of my dynamic expanding storage disk ) when the real OS disk usage was about 8GB…
Now it is 8GB again… amazing.
I hope it won’t grow again otherwise I will run the procedure once in a while.
Thank you very much,
Cheers
September 2, 2009 at 10:50 pm
[…] จาก https://kakku.wordpress.com/2008/06/23/virtualbox-shrink-your-vdi-images-space-occupied-disk-size/ […]
September 17, 2009 at 11:45 am
I got problems running nullfile 1.02.exe
at some stage the process stop and this message appears
Runtime error 101 at…..
and nothing happens…. thae dummy file is not erased.
Any comments?
October 23, 2009 at 12:13 pm
[…] This will define the drive X as the shared foldernet use x: \vboxsvr<folder> where <folder> has been defined using the virtual box guess additionswhile on the subject of VirtualBox – this shows how to shrink the vdihttps://kakku.wordpress.com/2008/06/23/virtualbox-shrink-your-vdi-images-space-occupied-disk-size/ […]
November 9, 2009 at 1:14 pm
and which version of vbox are we talking about ?
-Regards,
techspalace.blogspot.com (not only Ubuntu blog)
December 28, 2009 at 7:02 am
Ну вы бы подрались еще, нашли о чем поспорить 🙂
March 4, 2010 at 1:29 am
[…] VirtualBox – Shrink your VDI images. Image size = Space used up inside VM. « Ubuntu, Life, Mobile… (tags: compression virtualbox shrink vdi) […]
March 6, 2010 at 6:12 am
[…] VirtualBox – Shrink your VDI images. Image size = Space used up inside VM. « Ubuntu, Life, Mobile… (tags: compression virtualbox shrink vdi) […]
March 12, 2010 at 6:39 am
[…] VirtualBox – Shrink your VDI images. Image size = Space used up inside VM. « Ubuntu, Life, Mobile… (tags: compression virtualbox shrink vdi) […]
April 23, 2010 at 9:22 pm
Как улучшить зрение и какие методы использовать? [url=http://o-zrenii.blogspot.com/]Глазные капли Эй-пи-ви с прополисом, фирмы Тентори…
May 16, 2010 at 4:43 am
Download a random EXE from an unknown site and run it on my Windows box? Are you out of your mind? No way. That’s the way to virus city.
May 31, 2010 at 5:13 am
… except that virustotal doesn’t recognize it as a virus
August 13, 2010 at 1:04 pm
If you have data dont expect to shink more than that. I have 2.7G data and my file is like same. It didnt shrink
October 15, 2010 at 1:39 am
7zip advantages?
October 15, 2010 at 1:42 am
[…] ~2.95GB was about the size this particular image ended as, you can also use this tool to further compress images (700MB!) https://kakku.wordpress.com/2008/06/23/virtualbox-shrink-your-vdi-images-space-occupied-disk-size/ […]
November 23, 2010 at 3:55 am
Works Great … 12.5GB down to 6.5GB (WinXP 32bit)
November 23, 2010 at 2:36 pm
I compressed the vdi file with Winzip to a zipx file, and the resulting file was just “10%” of the original !!!!
(NOTE: I compressed it for archiving since I was not, currently, using it)
February 15, 2011 at 10:11 am
I went from 12GB to 5.3GB – and had a good laugh watching Windows twitch and squirm while its disk was filling up.
Thanks for the article!
February 19, 2011 at 4:41 am
[…] Compacted my Windows XP 6GB VDI Image to 4GB today according to this article. […]
July 30, 2011 at 1:25 am
Works great for me, took a 20GB Windows 7 guest image running on Mac OSX host down to around 10GB. Took a while, but very worthwhile. Works fine on Virtualbox 4.0.12 (most current build as of today) so not sure what the comments were about it not working for others on earlier versions.
August 17, 2011 at 2:31 pm
Mac OS X guests: the OS automatically does a lot of defragmenting for you–the two times I’ve shrunk an OS X image, I haven’t had to do any defragmenting. You can zero out your free space by opening Disk Utility, selecting your disk, going to the Erase tab, clicking Erase Free Space, then Zero Out Deleted Files.
August 23, 2011 at 12:40 pm
VBoxManage switches has changed with Oracle:
Was:
VBoxManage modifyvdi /media/Block/VDI/NewHardDisk1.vdi compact
Changed to:
VBoxManage modifyhd –compact /media/Blockk/VDI/NewHardDisk1.vdi
October 19, 2011 at 7:22 am
I am on a window host and a novice user when it comes to commands and terminal. I had to search several other threads to get VBoxManage command to work. I am writing these steps to help other users like me.
These are the steps to do the same in Window Host:
1. Open cmd.exe
2. type cd\ to go to root directory
3. Go to virtual box directory (assuming you have installed on c drive) by typing cd C:\Program Files\Oracle\VirtualBox
4. Type VBoxManage modifyhd -compact D:\xp.vdi (xp.vdi is name of my virtual disk in “D” drive. You can type your own address. Generally it is found in C:\Users\Dushyant\.VirtualBox\VDI)
It will show progress and you are done.
I reduced size of my xp disk from 9 gb to 4.3 gb
October 31, 2011 at 1:16 pm
[…] Sources: CompactMe, CompactMe2, CompactMe3Linux […]
March 21, 2013 at 1:35 pm
Under windows, Oracle VirtualBox 4.2.10 this works
“c:\Program Files\Oracle\VirtualBox\VBoxManage.exe” modifyhd Windows7.vdi –compact
August 31, 2014 at 3:59 pm
Hi! I’m at work browsing your blog from my new iphone 4!
Just wanted to say I love reading through your blog and look forward to all your posts!
Carry on the superb work!
August 5, 2015 at 6:45 am
if you have a guess windows SO yo can use the next command to remplace nullfile
cipher /w:X where X is the letter of the drive
August 5, 2015 at 7:52 am
And use VBoxManage modifymedium “vdi path” –compact
March 20, 2016 at 2:04 am
the truth about it is possible to be extremely stable in the next days. France is the logical territory for btc to be used for currency
May 11, 2016 at 6:59 am
Hi Guys.
A quick pre-sales question.
How would I make the portfolio section go from black and white to color on hover?
Could this be done? Is it something you could help me with if I brought another license?
Kind regards Hoey
July 12, 2016 at 12:50 pm
For all unix-based guests (*BSD, Linux, and Mac) you can just write a file full of zeroes. No need to download and compile some source files. You might not want to have to install a compiler anyway.
Just do this:
dd if=/dev/zero of=$HOME/zerofile.img bs=4m; rm /zerofile.imgThis will null your home partition by filling it with zeroes. If you have just one partition, you are done. If you have seperate partitions, figure those out using the mount command and repeat (replate $HOME with /path/to/partition).
Also you should note: If you have encryption set up, this won’t work and might even be counterproductive. 00s encrypted are producing random scrambled data, which is in return uncompresseable.
Hope that helps those running non-windows-guests.
—
For Windoze (or Wintendo as some might say), you can also use various other tools you might already have installed, like the popular CCleaner.
August 30, 2016 at 12:02 am
I dugg some of you post as I thought they were very useful extremely helpful
March 19, 2017 at 10:31 am
Mechanical forces play a central role in ubiquitous phenomena such as protein degradation, cell-adhesion, tissue organization, and muscle function in multi-cellular organisms. The key players in these phenomena are protein molecules, which act as mechanosensors and communicate the surrounding dynamic microenvironment with the cell. Hence, studying the mechanical response of these biomolecules would provide a wealth of information about their structure, function, and chemistry.
August 26, 2019 at 2:02 pm
This is nice post, love this site, will keep visiting, from https://unn.edu.ng